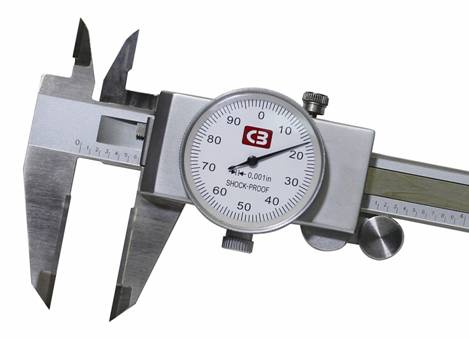
Chicago Brand Industrial, Stainless Dial Calipers offer fast measurement of outside, inside, step, and depth to within 0.001".
- Stainless Steel- Inside and Outside Measurement Jaws- 0.001 Reading- Accuracy 0-6" ( +/- .001")- Includes Case- One Year Warranty
How to Read a Dial Caliper
A dial caliper is a handy and versatile measuring tool. It can measure I.D, O.D, Step and depth.

Clean the measuring faces before and after measurement. Close the jaws and check that the indicator points to "0" on the dial face. If caliper doesn't zero, loosen the bezel clamp screw and rotate the bezel to the "0" position. Tighten the bezel clamp screw to fix the "0" position.
The main scale on the caliper with the inch system is marked every .100” and represents one revolution. Each graduation on the dial represents .001".

Thus a measurement of .617 inches would be obtained by reading .600 on the main scale, and then adding 0.017 as determined by the dial (as shown in the image).
Metric Dial calipers are read in a similar fashion.
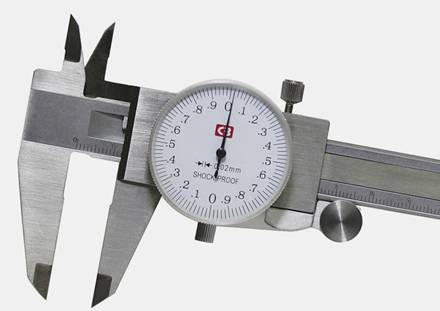
The main scale on the caliper has graduations every 1mm (millimeter) and represents one half of a revolution of the dial. Every 10th mark is numbered in cm (centimeters). Each full revolution is 2mm. (It takes 5 revolutions to make 1cm or 10mm). Each graduation on the dial represents .02mm.

Thus a measurement of 12.02 mm would be obtained by reading 1 (1cm = 10mm) temp-on the main scale. Add to that two graduations past the 1 and then adding 0.02 as determined by the dial (as shown in the image). 10 + 2 + .02 -$2$3$4= 12.02
Note: When using either a metric or inch dial caliper, smaller readings than those graduated may of course be obtained by visual interpolation between graduations.